
- Stardew Valley Roleplay Ideas – A New Way to Farm - May 9, 2023
- Stardew Valley Multiplayer Guide: Farm With Friends - February 27, 2023
- Stardew Valley Feast of the Winter Star Guide: A Winter Wonderland - January 23, 2023
Stardew Valley is one of those games that, from the outside looking in, looks like an unassuming little farming simulator. However, as you delve deeper and deeper into the world that this game offers, you begin to realize there is more to this cute, pixelated game than meets the eye.
Within this game, there are several simple to understand but tough to master mechanics, and for each of the activities that the player partakes in, there are a wide variety of items that will help the player on their journey. These items make tasks easier, more efficient, allow for automation, help you progress through the game, and much more.
However, you may be currently working on your farm, tilling the soil and cultivating crops, and wondering what items could help you become the ultimate farmer and make your ol’ grandpa proud. Well, that’s what we are here to help with. In this article, we aim to showcase each and every item within the game that will prove useful to you—breaking down its key uses, how to obtain this item, and detailing why they are so essential. So without further delay, here is our guide to the best items within Stardew Valley.
Best Tools:
Iridium Watering Can:

A watering can is an essential tool for any farmer that wants to see their crops grow. Unless you have sprinklers or it happens to be raining, you’ll need to water each tile individually for it to grow. However, when you have a fully upgraded watering can in your possession, this becomes a much easier task.
With an iridium watering can, the player will be able to water a 6×3 section of tiles and will have access to 100 charges, which is much more than the measly 40 charges offered by the standard watering can.
Iridium Hoe

Then we have the hoe, the tool used to till the soil and make it ready for planting crops. With an iridium version of this tool, the player will once again have access to a 6×3 area of effect with each charge.
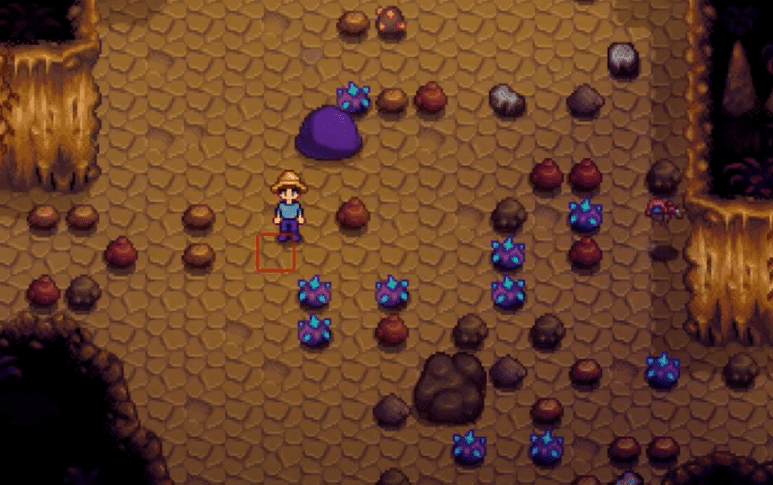
Iridium Pickaxe:
The pickaxe isn’t a tool that you will regularly use on your farm unless perhaps you have a mountain farm with a quarry. However, it is key to upgrade this tool as without a quality pickaxe, you’ll struggle to make the most out of trips to the mines, especially in the late game. With a fully upgraded pickaxe, players will be able to break rocks in the Skull Cavern in more swing.
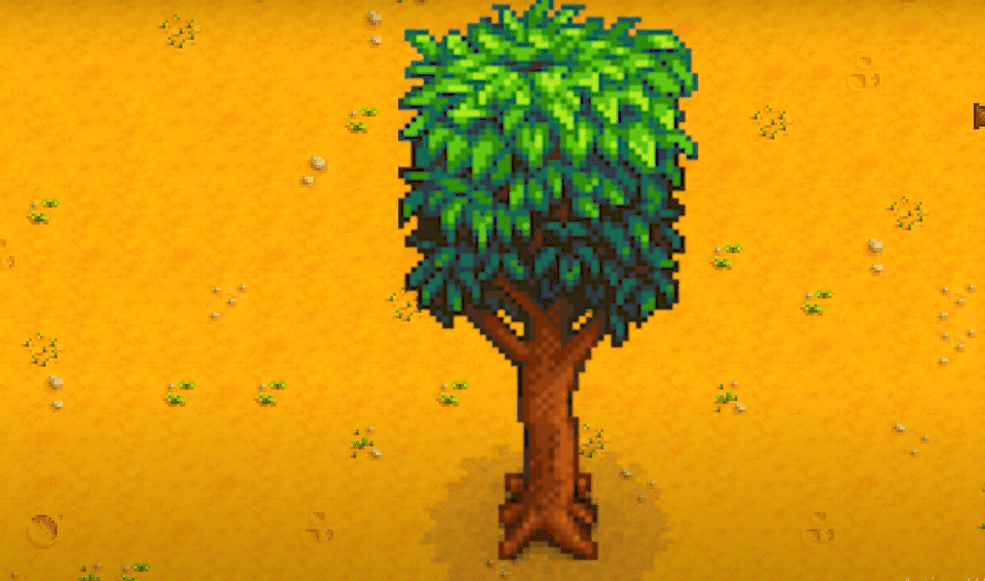
Iridium Axe:
An axe is also a vital tool, especially if you want to build coops and barns on your farm. However, without an upgraded axe, this process can take quite a while and waste a lot of your energy. However, with an Iridium Axe, you can cut down a fully grown tree in two strikes.
Golden Scythe:
The Scythe is a rather limited tool within Stardew Valley and is often only used for specific tasks, like harvesting specific crops and clearing grass. However, the Golden Scythe is much more versatile and effective. This tool has a larger area of effect, has a 75% chance of gathering hay from long grass. Plus, it can also be used as a rather dynamic weapon, especially in the early game.
Iridium Rod:
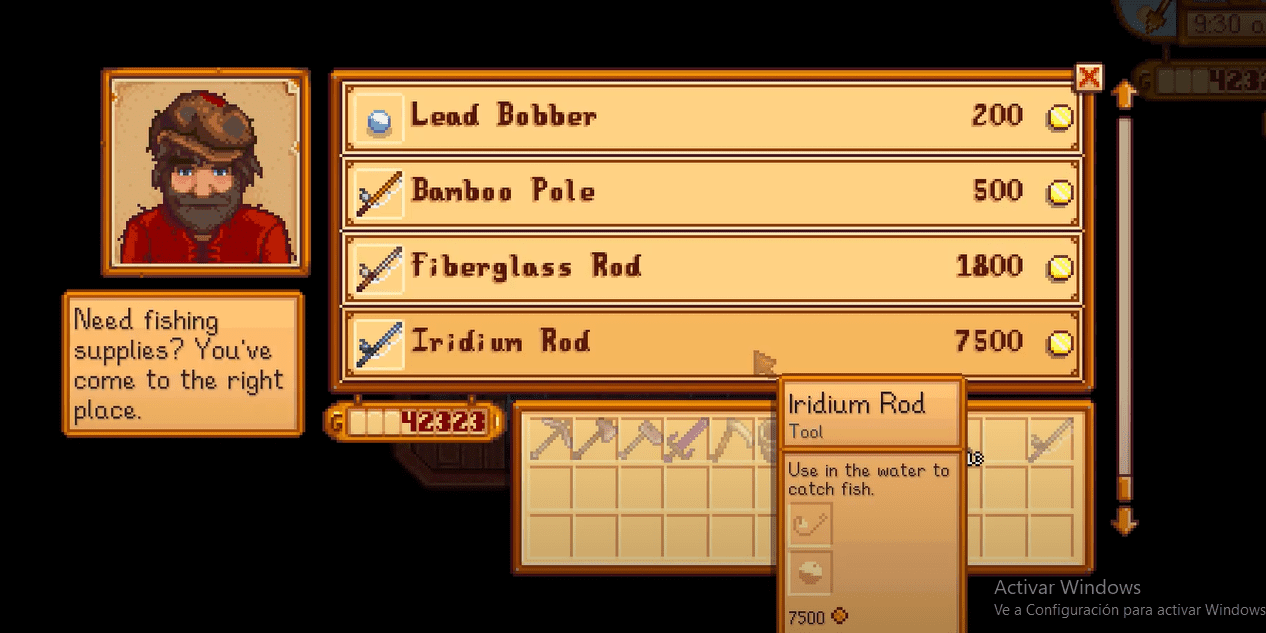
Fishing is one of the most cathartic and rewarding activities within the world of Stardew. However, if you keep using a bog-standard rod, you’ll never become as proficient as the top Stardew fishermen and women out there, nor will you have a chance of catching legendary fish.
So a good thing to invest in is an Iridium Rod. This rod allows players to equip accessories like bait and tackle. Here is a quick list of the best bait and tackle on offer:
- Bait
- Worm Bait
- Wild Bait
- Magic bait
- Dressed spinner
- Trap Bobber
- Lead Bobber
- Cork bobber
- Treasure Hunter
- Barbed Hook
- Curiosity Lure
- Quality Bobber
Iridium Trash Can:
Then lastly, for tools, we have the Trash Can. Some people may not consider this a conventional tool within the game, but it can certainly be upgraded like one. Standard trash cans simply act as a function that allows players to discard items from their inventory.
However, with an Iridium trash can, the player will receive 60% of any discarded item’s monetary value there and then. This is ideal for when you are having a super lucky day in the mines.
Best Weapons:
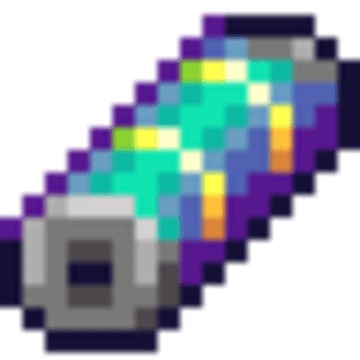
The Galaxy Sword:
When you are navigating the Pelican Town mines, it’s no secret that you don’t really need a super-effective sword to get things done and lay waste to your enemies.
However, when you nab the Skull Key and head off to Skull Cavern, you will need something of substance to get you through. So if you are looking to bridge the gap and stand a chance of surviving a Serpent raid in the Skull Cavern, the Galaxy Sword is a super option.
All the player needs is one Prismatic Shard. If you take it to the three pillars in the desert and hold it aloft, your shard will transform into the mighty Galaxy Sword. This sword has an attack capacity of 60-80 damage, a +4 speed buff, and a .02 critical chance.
The Infinity Blade:
With the Galaxy sword in hand, you might want to go one step further and obtain an even more impressive sword. Well, if you combine this sword with three Galaxy Souls and sixty Cinder Shards while at the Ginger Island/Volcano Dungeon forge, you will be granted access to the Infinity blade.
This sword has an 80-100 damage capacity, a .02 critical chance, not to mention a +2 Defense buff and a +4 speed buff. Common variants of this weapon are the Infinity Dagger and the Infinity Gavel.
The Dragon tooth Cutlass:

If you are looking for something that is almost as powerful as the Infinity Blade and even more dynamic, you might get a kick out of the Dragontooth Cutlass.
This weapon can be found in chests within the Volcano Dungeon and offers users a damage capacity of 75-90, a critical chance of .02, and also have a 50% critical power buff. Other variants of this weapon include the Dragontooth Shiv and the Dragontooth Club.
The Lava Katana:
We also think it’s important to discuss the best weapon that is readily available to players before they even make their way out to the Calcio desert. We tossed around some options like the Steel Falchion and Obsidian’s Edge, but ultimately, we landed on the Lava Katana.
This weapon can be purchased from the Adventurer’s Guild as soon as you reach the bottom of the mines for 25,000g. This weapon has a damage capacity of 55-64, a critical chance of .015, and has +3 defense, 25+ Critical power, and +3 weight buffs.
Master Slingshot:
Then lastly, we have to include the Master Slingshot. We admit, due to the mechanics and the scarce quality ammo needed to make this weapon truly viable, it isn’t a weapon for everyone. Plus, if you aren’t playing on PC, it’s quite a pain to use at all.
However, in a pinch, this weapon can be a lifesaver. The player obtains this weapon as a guaranteed reward for reaching level 50 in the Pelican Town mines, and its output depends on the ammunition you decide to use.
For the best results, you’ll want to use Iridium Ore as ammo for this weapon. If you do, then the Master Slingshot has a damage capacity of 50-202, making it the highest damage capacity in the game.
Best Clothing/Accessories:
Mermaid Boots:
We move on to clothes and accessories, which essentially translates to footwear and rings. First up, we have the Mermaid boots, Which are stylish blue heeled boots that can be obtained from the Volcano Dungeon by opening chests. These boots offer the player a +5 defense buff and a +8 immunity buff.
Space Boots:
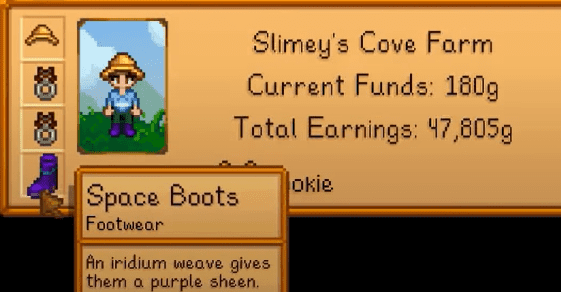
Next, we have the Space Boots. These are the best boots that one can have in their possession without heading off to the Calcio Desert or Ginger Island.
These boots are a given to the player for reaching level 110 in the Pelican Town mines. These boots are designed like astronaut boots and have a purple glow to represent Iridium. They also have both a +4 defense and immunity buff too.
Cinderclown Shoes:
The Cinderclown shoes are perhaps the best all-around boots within the game, especially for those that favor defense over immunity. These boots can be found in the Volcano Dungeons and can be purchased for 100 cinder shards from the Dwarf’s Shop. These boots have a defense stat of +6 and an immunity stat of +5.
Dragonscale Boots:
Then lastly, where boots are concerned, we have the Dragonscale Boots. These boots can be found within treasure chests within Volcano Dungeon and provide the highest defense stat in the game. These boots have a +7 defense buff, but players will not receive any immunity from these boots.
Immunity Band:
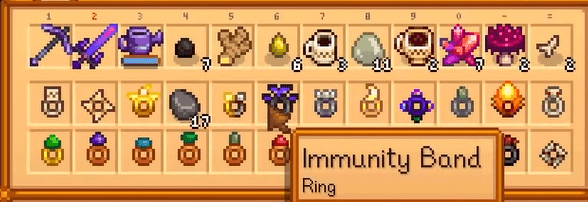
Now, moving on to the best rings, beginning with the Immunity band. This is an item that can be found from level 100 of the Pelican Town mines onwards and also appears in the Skull cavern. This ring offers a +4 boost to the player’s immunity stat.
Phoenix Ring:
The Phoenix ring is the safety net that all avid explorers need to have. This ring is essentially like a second life when exploring the dungeons. When your health reaches zero, this ring will activate and restore your health by 50% so you can continue with your day. This can only be used once per day.
Soul Sapper Ring:
Now we have a ring that is great for players who love to explore the mines and get a lot done without having to prepare lots of food to keep energy high.
The Soul Sapper ring can be found randomly within chests throughout the Volcano Dungeon and in terms of what this ring offers. When a player kills an enemy, they will be granted a reward of 4+ energy each time they slay a monster.
Lucky Ring:
The Lucky ring is a super item for those that want to mine, even on days where the spirits are perturbed. This item can be found in chests within the Volcano Dungeon and grants the wearer a +1 buff to their luck stat.
Napalm Ring:
If you are looking for an accessory that has explosive qualities, the Napalm ring is the best choice around. This ring can be found at the Adventurer’s Guild and can be purchased for 30,000g after the player has slain 250 Serpents in the Skull Cavern.
This ring has a unique quality that causes all defeated enemies to explode. This causes area of effect damage, often destroying chests, barrels, and other debris on the floor, as well as enemies. However, this does not hurt the player’s character.
Crabshell Ring:
The Crabshell Ring is a great way to improve your sturdiness when battling through the mines and dungeons. The Crabshell Ring becomes available at the Adventurer’s Guild when the player kills sixty rock crab enemies. Then players can purchase this ring for 15,000g. The ring offers a +5 buff to the player’s overall defense stat.
Hot Java Ring:
This one may feel like a little bit of a silly item, but when you understand the application of this ring, you begin to see the benefits.
The Hot Java Ring can be found in the Volcano Dungeon by opening chests. Then the wearer of this ring will have an increased chance of receiving Coffee or Triple-Espresso shots as drops. These items offer huge speed boosts and can help players get more done in a day or be the difference between passing out or getting home before 2 am.
Thorns Ring:
This ring is a great one for players that find themselves taking a beating when they travel to the mines. The Thorns Ring is an item that can be obtained when the player reaches level seven in their combat skill. Then they can craft the item by combining a gold bar, fifty stone, and fifty bone fragments. The unique quality of this ring is that when the player takes damage, the enemy who inflicted it will be hit for the same amount of damage.
Best Crops:
Strawberries (Spring):
Now we move onto the lifeblood of your farm (Unless you go with livestock), crops. The best and most profitable crop that you can plant in Spring is, without a doubt, Strawberries.
The problem with these crops, at least within the first year, is that you can only get seeds for them during the Easter event halfway through Spring. Meaning you only really get two yields from what you plant. However, even with that in mind, it’s still worth doing.
These sell for 100g each and sell (if iridium quality) for 240g, offering players a 140g profit overall. Plus, they are relatively fast-growing crops and repeat growers too. Meaning one seed can offer three yields a season or infinite yields in the Greenhouse.
Starfruit (Summer):
Starfruit is the most expensive crop to grow within the entire game, with each seed costing a whopping 400g at a time. However, the returns on Starfruit harvests make this investment worth it. These seeds can be obtained only from the shop within the Calcio Desert from Sandy.
When they grow, you can sell these crops (if iridium quality) for 1,500g, meaning players can earn a potential 1,100g profit per seed and these seeds take 13 days to grow, meaning you can harvest two yields a season.
Coffee Beans (Spring/Summer):
Whether it is to be used for profit or as a resource, we swear by the efficiency and the usefulness of the coffee crop. The player can grow coffee plants in the Spring and the Summer, taking up to ten days to grow, then produce coffee beans every two days after.
Each plant has four beans per yield guaranteed. However, there is a small chance of receiving more, up to seven beans. These seeds can be acquired from the traveling merchant for 2,500g each, or there is a 1% chance the player will receive one as a drop after killing a Dust Sprite.
The beans themselves don’t actually sell for that much. With the highest possible value being 30g per bean. However, if you utilize a keg and create coffee and then subsequently triple shot espresso’s
Cranberries (Fall):
Fall can be a tricky one to decide on, as there are recurring crops like Corn which you can carry over from the Summer, and potential giant crops like Pumpkins. However, we think that the best one to go for is Cranberries. Not only do these crops offer multiple berries per seed.
They also sell for good value as well. One seed costs 240g, and you are guaranteed two berries per yield, meaning potentially 150g each. However, there is also a random chance of getting more berries per yield up to four berries, which can mean a 360g profit per seed, luck depending.
These crops can be purchased at Pierre’s or at Joja Mart, take seven days to mature, and five days for regrowth. Plus, it’s worth noting that these berries are a good source of energy and health, which make them perfect for the mines.
Sweet Gem Berries (Fall):
Next up, we have the Sweet Gem Berry, a rare crop that can be acquired from the traveling merchant for 1,000g. This crop may not be in great supply; however, despite this, the crop is still an excellent thing to grow in the Fall. This crop will take the majority of the season to grow (24 days).
However, when you do finally see one of these crops mature, you will potentially have a Sweet Gem Berry that is worth up to 6,000g meaning a 500% profit.
It’s also worth noting that if you take this crop to the Master Cannoli statue in the Secret Woods asking for ‘The sweetest taste’ and you will receive a star drop for your troubles.
Pineapple (Summer)
Pineapple crops are one of the newer additions to the game brought about by the tropical location, Ginger Island. However, if you don’t want to grow them year-round on the island, you can grow them at home as long as it is Summer.
These can be obtained through the Island Trader, or they can be found when exploring the Volcano Dungeon through Magma Caps. These seeds are relatively easy to find, making them an easy way to make a 100% profit, and with each crop, you can make up to 650g each.
These crops take 14 days to grow and then seven days to regrow, so you will get three yields from these seeds.
Ancient Fruit (All Year):

Then last, you have what is easily the best money maker in terms of crops within the game, the Ancient Seed. These crops can be grown in any season except winter and can be acquired from the Travelling merchant for a price that will not exceed 1,000g, or they can be crafted if you know the recipe. These crops take 28 days to grow mature, and then they will offer fruit every week afterward. So if you plant in the first days of spring, you can get nine yields from this crop.
This crop has the potential to make up to 1,100g per Ancient Fruit and has even more potential if you make some ancient fruit wine. This may be a long-term plan, but it’s one that pays dividends down the line for those who wait.
Best Machines:
Bee House:
Now, we move on to the machines and apparatus that one can use on their farm. Beginning with the Bee House, an item that allows you to make honey. When this item is placed on the farm, it will periodically offer Honey to the player every four days.
This honey can be altered and raised in terms of cash value if the player grows flowers and places the bee house around said flowers. These flowers and the Bee House has to be within five tiles of each other for this to work.
To obtain a Bee House, the player needs to raise their farming level to three. Then they will also need Maple Syrup, an Iron Bar, forty wood, and eight coal. Or alternatively, the player may receive their first Bee House through acquiring it in the Fall Bundle for the Community Center.
Mayonaise Machine:
Now we have the mayo machine. This is a piece of apparatus that can be placed indoors or outdoors which produces mayonnaise. All you have to do is take an egg and place it in the machine; then, after the machine is done processing, you’ll have mayonnaise. This works for all eggs, including Dino Eggs, Ostrich Eggs, and Void eggs.
This can be crafted by the player when they reach level two in their farming skill. To do this, you will need to combine an Earth Crystal, a copper bar, fifteen stones, and fifteen pieces of wood.
Cheese Press:
A machine that works rather similarly to and compliments the above entry is the Cheese Press. This allows farmers to take any milk product and convert this to cheese. This machine works the same way as the Mayonaise machine. By simply placing milk into this machine and allowing for processing time, you will get some cheese.
To obtain the machine by raising your farming skill to level six. Then you will be able to make this machine by combining forty-five wood, forty-five stone, ten hardwood, and one copper bar.
Oil Maker:
This machine is one that won’t be all that useful to players until they have a good amount of cash flow. However, when you have some piggies on your farm, this becomes a real money maker. Pigs are able to dig up valuable truffles on your farm, which can be broken down by this machine to make Truffle Oil. All you have to do is place the Truffle Oil in the machine, and after processing, you’ll have some luxury oil.
To obtain the crafting recipe for this machine, you’ll need to reach farming level eight, and then you will be able to combine fifty Slime, one Gold Bar, and twenty Hardwood to make this machine. Truffle Oil sells for 1,065g, so it’s well worth it.
Kegs & Preserve Jars:
Next up are Kegs and Preserve Jars. We have bundled these together as they ultimately have the same properties but are used to create different types of artisan products. Preserve Jars are used to create jams and pickled vegetables. In contrast, kegs are primarily used to create alcoholic drinks like Pale Ale or other beverages like Coffee.
To obtain these, you will need to raise your farming level to level four for the Preserves Jar crafting recipe, and for the Keg, you will need to raise your farming level to level eight. Then you can craft a Preserves jar by combining eight coal, forty stone, and fifty wood. Whereas with the Keg, you will need to combine thirty wood, one copper bar, one iron bar, and one Oak Resin.
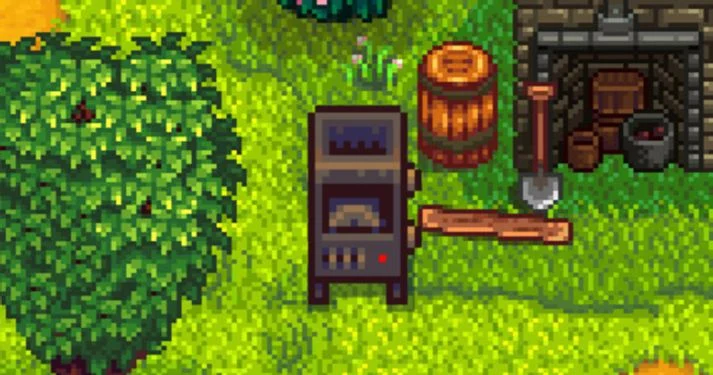
Crystalarium:
A Crystalarium is one of the most interesting machines that one can own in Stardew Valley and also one of the most profitable. With this machine, if you have a gem such as a Diamond, for example. You can place it in this machine, and within about two days, you’ll have another Diamond. Then this process will loop infinitely, meaning that you will have multiple Diamonds for your collection.
To obtain this item, you will need to raise your mining level to level nine, and then you will be able to craft this machine by combining five gold bars, two Iridium Bars, one Battery Pack, and ninety-nine stones. However, if you are struggling to raise your mining level, you can get your hands on one of these via the Vault room in the Community Center by completing the 25,000g bundle.
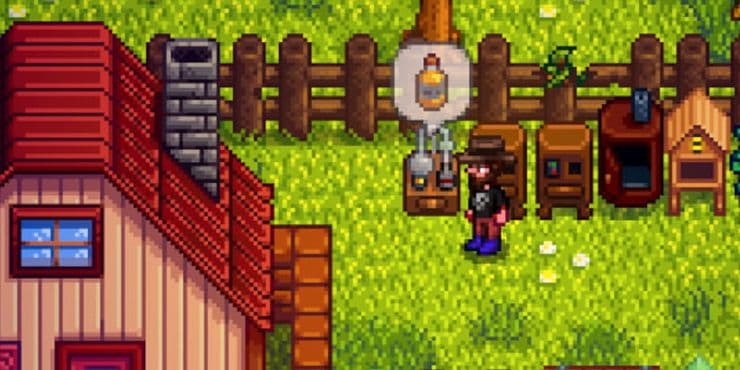
Lightning Rod:

If you want to make the most out of the machines on your farm and gain access to some quality automation tools, then you’ll need to get your hands on a Lightning Rod. This machine is a rod that attracts lightning during stormy weather, gifting the players a Battery Pack and granting you access to a variety of crafting options.
To access this machine, you will need to raise your foraging stat to level six, and then you will be able to craft this item. To craft, combine one Iron Bar, one Refined Quartz, and five Bat Wings. You also receive this as a gift for completing the 10,000g bundle in the Vault Room within the Community Center.
Recycling Machine:
If you are a keen Stardew Valley fisherman, then you’ll know the frustration that comes with collecting trash when you get a bite. However, with a Recycling Machine, you’ll be able to convert your useless trash into resources that can be very helpful, especially in the early to mid-game. With this machine, you can create resources like Cloth, Iron Ore, Coal, and Refined Quartz.
To get your hands on one of these machines, you will need to raise your Fishing stat to level four; then, you will be able to craft this. To craft this machine, combine twenty-five wood, twenty-five stone, and one Iron bar.
Tappers:
Tappers are perhaps one of the most underrated machines that you can use on your farm and around the town. These machines attach to trees and produce different resins, syrups, and tars based on the type of tree that you attach them to.
To get your hands on this apparatus, you will need to raise your Foraging stat to level three, and then you can craft the item by combining forty wood or two Copper Bars.
Geode Crushers:
Geode Crushers are one of the newer additions to the machine line-up within Stardew Valley. These machines basically offer a much more convenient way to break geodes without having to pay Clint a fee or abide by the Blacksmith’s hours. Using this machine, you can put your Geodes into the machine, and after a small period of time, you’ll have access to a new artifact, gem, or mineral.
To gain access to this machine, you’ll need to complete a special order for Clint, which you’ll find on the notice board in town. Then you’ll get the crafting recipe. Then by combining two Gold Bars, fifty Stones, and one Diamond.
Cask:
These items are somewhat similar to the Preserve Jars and Kegs. However, these can only be obtained when the player purchases the cellar upgrade within their farmhouse. This item allows the players to place items like Wines and Cheeses in the cask, and over time, the item will grow in quality, and therefore, value.
You can also craft more casks for your Cellar. However, you can only use these items when placed in the cellar, so you are limited to the number of Casks you can use. You can craft these containers by combining twenty wood and one piece of Hardwood. Also, it is worth noting that you can place 125 casks in your cellar and still have a natural path between them all.
Sprinklers:
Then lastly, for the machines, we have the sprinklers. These are machines that water the soil where you have planted your crops, automating your crop care and allowing you to go about other tasks with no need to water crops manually.
These come in three varieties, the standard Sprinkler, the Quality Sprinkler, and the Iridium Sprinkler, which is the best of the best and waters 24 tiles at the start of every day.
You will gain access to the crafting recipes for each sprinkler when you reach levels two, six, and nine in farming, respectively. Then you can craft each by combining one copper and one iron bar. One iron bar, one gold bar, and refined quartz. Or one gold bar, one iridium bar, and one battery pack.
Best Resources:
Copper:
Copper is one of the first resources that you will come across in Stardew Valley that isn’t a basic item like Stone or Wood. Copper is a powerful asset that will set you on your way in the world of Stardew Valley. You can smelt these bars, use them for crafting recipes, for upgrading your tools, or they may also be required for quests.
This resource is most commonly found in the first thirty levels of the Pelican Town mines but can also be found in the Quarry, bought from the Blacksmith, or can be found by panning in the river and lakes. Here are some things that copper is used for:
- Copper Bars
- Cherry Bombs
- Furnace
- Charcoal Kiln
- Cheese Press
- Crab Pot
- Keg
- Mayonaise Machine
- Sprinkler
- Tapper
Iron:

Then we move on to Iron, another ore that can really help you progress in this game. This ore also offers its own crafting options, allows you to upgrade your tools further, and can be smelted.
You can commonly find this resource on floors 40-79 in the Pelican Town mines. However, they can also be found within the quarry and bought from Clint the Blacksmith. Here is a list of the most important items that can be obtained through the use of Iron Ore:
- Iron Bars
- Bombs
- Bee House
- Quality Sprinklers
- Keg
- Crab Pot
- Recycling Machine
- Lightning Rod
Gold:

Then we have Gold ore, an item that not only serves as a means of progression within Stardew Valley but can also be a great way to make cash within the mid-game too. This item can be smelted, has a handful of relevant crafting recipes, and also sells for up to 375g each when smelted into bars and sold if you have the Blacksmith’s Profession perk.
This ore can be found obtained by purchasing from Clint the Blacksmith but is commonly found within floors 80-120 in the Pelican Town mines and the Skull Cavern. Here is a list of the items you’ll need to have Gold Ore to obtain:
- Gold Bars
- Mega Bombs
- Iridium Sprinklers
- Oil Maker
- Crystalarium
- Seed Maker
- Geode Crusher
- Mini-Obelisk
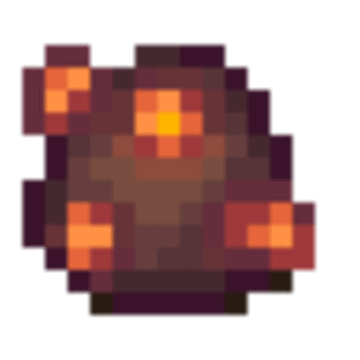
Radioactive Ore:
Now, we have a relatively new addition to the raw materials within Stardew Valley. Radioactive Ore is a material that can be used to create special items and other end-game material within the game. This item can be commonly obtained within the Skull Cavern.
However, if the player activates the Shrine of Challenge on level 120 of the Pelican Town mines, they will also find it there. Here are some of the best uses for Radioactive Ore and radioactive Bars:
- Magic Bait
- Hyper Speed Gro
- Heavy tapper
- Hopper
Iridium:
Then lastly, in terms of the ore, which you can smelt into bars, we have Iridium Ore. This is the rarest and most desirable raw material in the game and opens some of the best opportunities within the game for the player.
This item can be obtained through mining in the Skull Cavern, is a rare drop from some enemies, and can also rarely be obtained through mining an asteroid that lands on your farm. Here is a list of the best items that you can make with the help of Iridium Ore:
- Iridium Bars
- Iridium Sprinkler
- Crystalarium
- Wedding Ring
- Hopper
Hardwood:
Next up, we have a resource that allows you to create much more sturdy wooden items and buildings. Hardwood can be obtained in small quantities from the mines. However, with an upgraded ax, you will be able to gather this from large tree stumps and also from Mahogany trees. This item also allows players to build key structures like stables and Home Upgrades. Here is a list of all the items and crafting recipes that require Hardwood:
- Cheese Press
- Oil maker
- Hardwood Fencing
- Cask
- Heavy Tapper
- Hopper
- Mini-Obelisk
Coal:
While it doesn’t make for an ideal Christmas present, coal is a very good thing to have to hand within Stardew Valley. This item has a few relevant crafting recipes, plus it serves as a means of powering furnaces, which allows you to smelt ore to make metal bars.
This item can be obtained by using your hoe on soil; you will commonly find it by breaking stone; you will often find it in the mines, especially in mine carts. You can also obtain Coal as a drop from Dust Sprites and also, you can use a Charcoal Kiln to break down wood for coal. Here are some of the best uses for Coal:
- Bee House
- Preserves Jar
- Bombs (various)
- Scarecrows
- Seed maker
- Cookout Kit
Battery Packs:
Then lastly, we have Battery Packs. This is an item that is commonly used to power electrical machinery and serves as a gateway to some of the best-automated options in the game. You can obtain battery packs by placing Lightning Rods outside during stormy weather. However, you can also purchase this item semi-regularly from the Travelling Merchant. Here are some of the best uses for Battery packs:
- Iridium Sprinklers
- Crystalarium
- Farm Computer
- Mini-Jukebox
- lamp-posts
Best Special Items:
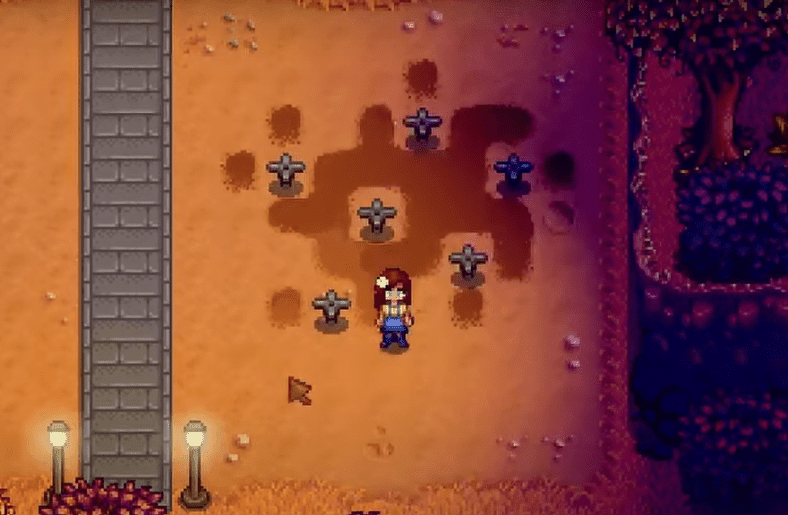
Statue of Perfection:
Then we move on to the more specialist items found within Stardew Valley. Beginning proceedings with the Statue of Perfection. This is an item that is obtained as a reward when the player finishes their third year and has managed to light four lamps on their Grandfather’s shrine. You will only obtain this item if you interact with the shrine. This item offers the player 2-8 Iridium Ore per day.
This is not to be mistaken for the Statue of True Perfection. That is an even more desirable upgraded version of this item that is obtained by interacting with Mr. Qi’s perfection meter on Ginger Island when the player has a 100% rating. The upgraded version offers the player one Prismatic shard per day.
Statue of Endless Fortune:
The Statue of Endless Fortune is a variant of the above entry but is obtained through different means and offers a different daily reward.
The player can obtain this item by purchasing it within the Oasis Casino for 1,000,000g. This statue produces one daily gift for the player, which on days when there is a Birthday on the calendar, will be that person’s most loved item. Then on days where there is no birthday, this will be replaced by either a Diamond, an Iridium Bar, a Gold Bar, or an Omni-Geode.
Hopper:
A hopper is a newer item within the series that allows players to take automation to a whole new level. When this item is placed in front of any machine with items that can be placed within the said machine, then the items will be popped into the machine without any player input, allowing you to go about your business.
This item can be obtained through purchasing from Mr. Qi’s Walnut Room for 10 Qi Gems, or you can buy the recipe for fifty of these gems. Then to craft, combine one radioactive bar, one iridium bar, and ten Hardwood.
Mini Obelisk:
This is an item that allows you to create a teleportation channel for yourself, so long as you have two obelisks in effect. To use, simply place the mini-obelisks in the areas you would like to teleport between and then interact with one to teleport to the other.
This item is craftable, and the recipe is obtained by completing a special order for The Wizard. To craft, the player must combine thirty Hardwood, twenty Solar Essence, and three Gold Bars.
Farm Computer:
This is an item that makes automation run much smoother and allows you to use your time much more effectively. This is an item that allows the player to gather info and statistics about their farm and check the status of various things like the Farm Cave, crops, and other entities, which means that the player doesn’t have to physically walk to their area of the map to check the progress.
This is an item that is craftable after you receive the recipe from Demetrius after completing a special order for him. Then you can craft this item by combining a Dwarf Gadget, a Battery Pack, and Refined Quartz.
Prismatic Shard:
This item could potentially be considered more of a resource, but because of the rarity of this item, we opted to slot it in here. The Prismatic shard is a rare substance that has a lot of interesting uses within the game, all of which are real game-changers. Here is a quick list of uses below:
- It can be sold for 2,500g per shard
- It can be used to obtain the Galaxy Sword
- It can be used to enchant tools
- It is needed to Complete the Museum collection
- It is a gift loved by all recipients
- Used to craft a Wedding ring
Bouquet:
The Bouquet is an important item if you ever want to start a romantic relationship with any of the eligible Bachelors and Bachelorettes within the game. This item represents the player asking a romantic interest to be their boyfriend/girlfriend/partner.
This item can be bought from Pierre for 200g, and to use this item, simply give this to your romantic interest as you would any other gift. You can even do this if you have already given them a gift that day. Note that those receiving the bouquet will only accept if you have raised their relationship with you to eight hearts.
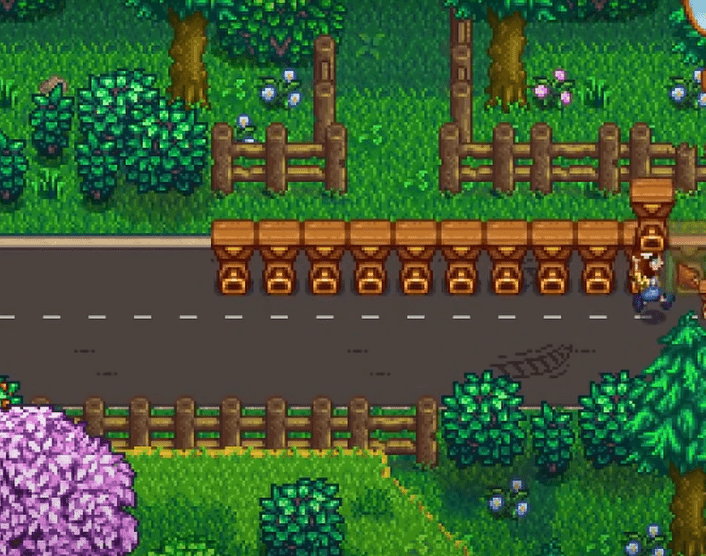
Mermaid Pendant:

Then moving neatly on from the last entry, we have the Mermaid Pendant. This is the Item that represents the natural next step in your relationship with a romantic partner. When you have built your relationship up to ten hearts, you will be able to successfully ask your partner to marry you.
However, you will need this pendant to do so. This is obtained by heading to the section of the beach that is across the broken bridge, which needs 300 pieces of wood to repair. There, you will find an old mariner who will sell you the pendant. However, he will only show up when it is raining and will only sell this to you if you have also bought the first farmhouse upgrade. This item costs 5,000g.
Stardrops:
Stardrops are one of the most important and rewarding items to collect within Stardew Valley. Not because of their value or their application on your farm, but because they allow you to do more and work harder for longer. You see, with every Stardrop you collect, the player receives a permanent buff of 34+ to their energy levels. There are seven Stardrops to collect within the game. Here is a brief rundown of where to find each one:
- It can be purchased at the Stardew Valley Fair for 2,000 Star tokens
- It can be obtained by reaching level 100 in the Pelican town mines
- It can be obtained when the player reaches 12.5 hearts in a relationship
- It can be purchased from Krobus for 20,000g
- It can be obtained from the Master Cannoli statue in the Secret Woods in return for a Sweet gem Berry
- It can be achieved by earning the title of Master angler. (Catch all the fish in the game)
- Can be obtained by filling the entire Museum (95 donations)
Gold Clock:

Then lastly, we have the Gold Clock, the most expensive item within the entire game (even though it’s technically considered a building). This structure has an active effect when placed on your farm that prevents any debris from appearing on your farm and any of your structures like fences from deteriorating over time. This also applies to your farmstead on Ginger Island. This can be bought from the wizard after finishing the quest ‘Goblin Problem.’
FAQs
Question: What is The Most Important Item in The Game?
Answer: This is such a tricky question as there are so many different ways to play this game, and none of them are wrong. You can structure your farm to focus on a different way of making a profit and still find great deals of success, or you might really dislike the mechanics of certain aspects of the gameplay, which renders some items less useful to you than to others. However, there is no getting past the notion that some items are more valuable and useful than others. So with that in mind, here are five items that we believe are the best of the best:
• Stardrops
• Ancient Fruit
• Infinity blade
• Mermaid Boots
• The statue collection
Question: How Many Items Can The Player Hold at One Time?
Answer: This depends on if the player has been playing for a while and taken the time to head over to Pierre’s and buy backpack upgrades. When you begin your game, you have access to one row of inventory, meaning you can carry twelve items. Then with a 2,500g upgrade, you will have access to twenty-four inventory spaces. Then when you fully upgrade your backpack for 10,000g, you will have access to 36 item slots.
Question: What is The Best Way to Find Rare Items?
Answer: It really depends on the type of item that you are looking for, as certain items will only be found by visiting certain areas and partaking in certain activities. However, outside of engaging with every aspect of this game, here are some tips for finding rare items that you would maybe not have access to without doing very specific things:
• When fishing, always try to catch the treasure as well as the fish. This can often lead to obtaining rare items.
• Be sure to mine regularly; a lot of the best loot is hidden in the Pelican Town Mines, Skull Cavern, and out on Ginger Island.
• Look out for worms on the ground and always hoe that tile; it can often be a rare artifact.
• Visit the Travelling Merchant every time they visit. They often carry items that are rather hard to procure.
Stardew Valley Best Items Guide: A Cavalcade of Items to Collect!
As you can see from the items listed above, there are so many things that you will want to add to your collection within Stardew Valley.
So much so that we can already picture your room dedicated, color-coded chests packed to the brim with all your loot. We hope that this guide serves as a good resource for you and helps you on your way to finding all that you need to create the perfect farm!