
- Artisan vs Agriculturist Stardew Valley - April 12, 2023
- Stardew Valley Owl Statue Guide - April 12, 2023
- Stardew Valley How to Win Egg Hunt - April 12, 2023
Stardew Valley Museum & Library
- Managed by: Gunther
- Open: 8 am – 6 pm
- Located: Across the bridge at the bottom right corner of the Town Square above the Beach
- Purpose: Donate items and receive rewards
The Stardew Valley Museum & Library is a building that Gunther manages, both the Museum and library aspect of the building. The Museum and the library are both operating within one building, which is across the bridge at the bottom right of the Town Square. You will notice that it is often frequented by Penny and some of the local children.
The Museum/Library is open between the hours of 8 am and 6 pm. Visiting the building will become a key part of your gameplay, as you explore the town on your daily adventures you may notice worms on the ground, if you hit these with your hoe you will receive something in return.
This is how you discover artifacts for the Museum, or lost library books. If you find a lost book, it is instantly added to the collection in the library, but if you discover an artifact you should bring it to the Museum to be donated.
You can donate these by approaching Gunther at the front desk, selecting make a donation, and selecting the item you wish to donate. Other items that can be donated are crystals that you locate within the mine. Each time you make a donation there is a possibility that Gunther will provide you with a reward, these can range from fertilizer, home decorations, or seeds.
It will be very clear when you receive a reward, as there will be a sound effect after your donation and a pop-up that advises you to collect your reward. You must then approach Gunther again and select collect a reward. If you are playing within a Co-op the reward will be available to every member.
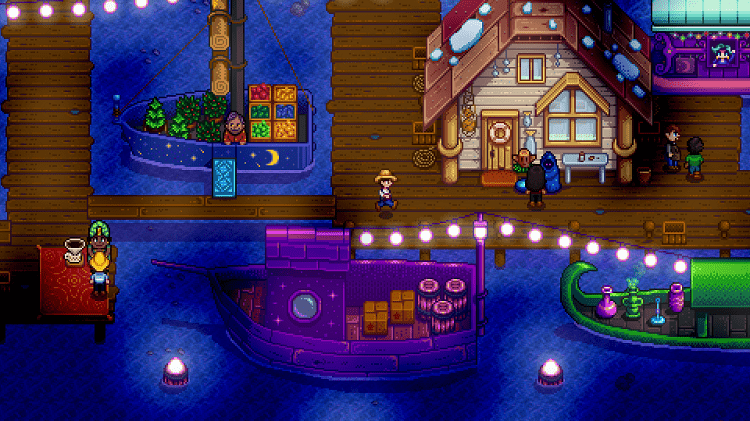
Stardrop Saloon
- Managed by: Gus
- Open: 12 pm – 12 am
- Located: In the Centre of Town Square to the Right
- Purpose: Socialisation/Recreation
The Stardrop Saloon is a bar and restaurant that is owned and managed by Gus, who also lives here. Emily also works there and can be found behind the bar with Gus. A lot of the residents will gather there each night around 7 pm onwards (although some can be found earlier).
The bar also has some fun arcade games in the back right corner, which you can take part in, although be warned these are notoriously hard to beat! The games available are Journey of the Prairie King (a shooting game) and Junimo Kart (a platformer game). There is also a Jukebox available for free, which allows you to change the song playing in the Saloon, although please note you can only pick from the songs that you have found in the game so far.
There are a variety of refreshments in the Saloon. There is a vending machine beside all the arcade games in the back right corner of the bar. You can also purchase drinks by approaching the bar and speaking with Gus or Emily, although either Beer or Coffee are the only options. Be careful when drinking Beer as it can slow down your speed of movement, Coffee, on the other hand, can temporarily increase your speed.
Food is available within the Saloon which can be eaten at the time or stored for later use (such as for health or energy when you are going down the Mines). The options available are Salad, Pizza, Spaghetti, or Bread. Further to food and drinks, some recipes are also available to enable you to create your own dishes at home. These include Hash browns, Omelettes, Tortilla, Pizza, Pancakes, Bread, Maki Roll, Cookie, or Triple Shot Expresso.
The Saloon is also an easy way to communicate with a large number of community members at once to improve your relationships with them. You can also gift them any items you purchase at the bar for the same purpose. If you want a safe bet, Beer and Pizza are good options!
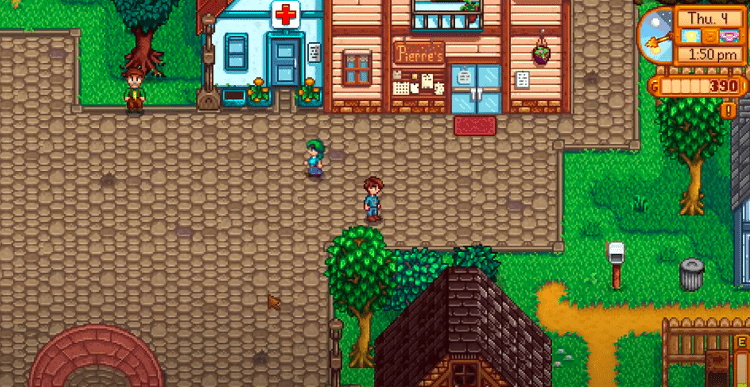
Pierre’s General Store
- Managed by: Pierre
- Open: 9 am – 5 pm but closed every Wednesday
- Located: In Town Square at the top right above the Bar
- Purpose: Purchasing goods and resources
The General Store is a shop that is owned and managed by Pierre, who also lives there with Caroline and Abagail. This is arguably the most crucial building for players as it is the main supplier of any crops, animal products, food, artisan goods, and home decorations.
Not to mention you can purchase a backpack here which allows you to carry much more items to make your foraging and adventuring much easier without having to leave valuable items behind!
Although some items are stocked year-round such as Saplings (Orange, Cherry, Apricot, Peach, Apple, and Pomegranate) Wallpaper, Flooring, a Catalogue (which gives access to all Floors and Wallpapers) Speed Gro (Deluxe and standard) Soil and Fertilizer (Basic and Quality) Grass Starters, Oil, Vinegar, Rice, Wheat flour and Sugar. The stock also changes seasonally to contain season-specific crops.
When you finish the community center Pierre’s will be open every day of the week but bear in mind until this is complete that it is closed on Wednesdays, so be sure to plan around this to ensure you are not missing crucial items!
As you progress, you will have the option to sell items to Pierre, which will be displayed within the store.
The Fish Shop
- Managed by: Willy
- Open: 9 am – 5 pm but closed every Saturday unless it is raining
- Located: On the pier at the Beach
- Purpose: Selling sea creatures and purchasing sea fishing supplies and produce
The Fish Shop is a store owned and managed by Willy, who also lives there. It is important to remember that you will be unable to access the shop until you receive the letter from Willy when you first start your farm. When selling items, you should be aware that Willy will only purchase the following from you; Fish, Tackle, Foraged Beach Items, Bait, Rope, and Squid Ink if you happen to have it!
From the shop, you can purchase; Fish Tanks, Fishing Rods, a Copper Pan, Fishing Rod Attachments (Magnet, Spinner, Hook, Bobbers, and a Treasure Hunter, and Bait), Trout Soup, a Crab Pot, and a Double Bed.
The Carpenters Shop
- Managed by: Robin
- Open: 9 am – 5 pm but closed on Tuesdays, and closes at 4 pm on Fridays
- Located: In the Mountains at the very top left
- Purpose: Construction buildings
The Carpenters Shop is a store owned and managed by Robin, who also lives there with her family (Demetrius, Maru, and Sebastian). This is another critical building as you will need to visit Robin to add any buildings or structures to your farm. Farm buildings available from Robin include Barns, Sheds, Coops, a Mill, a Fish Pond, a Silo, a Slime Hutch, Cabins, a Well, a Stable, and a Shipping Bin.
Although most often, the Coop and Silo are your first purchases if you are eager to get some farm animals. The shop will also purchase a small number of items from you, which include Stone, Wood, Fibre, Clay, and Hardwood. It is important to know that as well as costing coins, the buildings also require resources such as wood and stone, so you should ensure you bring these with you when you request the building to be made by Robin.
Robin can also upgrade your home for you. There are three stages of upgrades available, which improve with each stage. The first adds a kitchen and expands the size of your home, the second adds two rooms and expands the size of your kitchen, the final stage adds a cellar that is accessible via the kitchen and can be used to create products such as wine and beer.
There is also some individual customization available as Robin also provides options to add specific rooms to parts of your home. These include a southern or corner room and the ability to create an open plan kitchen/bedroom by removing the wall.
Marnie’s Ranch
- Managed by: Marnie
- Open: 9 am – 4 pm but closed on Mondays and Tuesdays
- Located: In the Forest south of your farm
- Purpose: Farm Animals and Farm Supplies
The Ranch is a store owned and managed by Marnie, who also lives there with Shane and Jas. You can purchase farmyard animals from Marnie, including Chickens, Cows, Sheep, Pigs, Rabbits, Goats, and Ducks. You can select how much of each animal you purchase, although it is important to note that Coops can only hold a certain amount of animals and so if you want more, you may need to purchase multiple coops.
Each animal is only available as you progress and build the appropriate home for it, the buildings which home-specific animals are all clearly explained within the Carpenters shop. Once you purchase an animal from Marnie you will be asked to name it and assign it to a coop on your farm.
Other resources for your Animals can also be purchased from Marnie, which include; Heaters (which are important to keep your animals warm in the winter) Hay (to feed your animals, although this can also be created by having a Silo on your farm and collecting grass) Shears (to collect wool from your Sheep) Milk Pail (to collect milk from Cows) an Auto Grabber (this is a super helpful item as it automatically collects items from your animals for you)
The Community Centre

- Managed by: No one, it is a derelict building
- Open: The center unlocks from the 5th of Spring onward and is introduced in a cutscene by Mayor Lewis
- Located: Just north of Pierre’s Shop
- Purpose: Restoring the Community Centre by bringing required items unlocks new rewards for the Farm. Completing all of these required events restores the Community Centre
The Community Centre is initially locked and unavailable to you. It is available from the 5th day of Spring. To unlock the Community Centre, you simply approach it on or after the 5th of Spring, and you will see a cutscene with Mayor Lewis, which explains that the Centre is run down and in need of repair. When you enter it, you will be introduced to a new type of creature, which is called ”Juminos.”
Within the back left room, there is a Golden Scroll which you cannot read, the next day. However, you will be asked to do a Quest for the Wizard. When you complete that Quest, you will be able to view the different ”bundles” in each room of the Community Centre.
To contribute to each of these, you simply bring the requested items into the corresponding room and unload them into the correct Bundle.
There are five rooms and a Bulletin Board to complete. When each is complete, you receive a new reward. Completing the Crafts Room will reward you by repairing the bridge, which will give you access to the town Quarry. Completing the Pantry will reward you with a Greenhouse on your farm, which you can use to grow crops regardless of the season!
Completing the Fish Tank will remove the boulder near the river, which means that you can start to plan for materials. Completing the Boiler Room will repair all the carts within the town, which means you can travel much quicker between your own farm and the mines, as well as the bus station and the Quarry.
Completing the Vault unlocks the old bus stop near your farm, which means you can now travel to a new place (Calico Desert) Lastly, completing the Bulletin Board improves your relationship levels with everyone in the town.
When all of these are complete, you are presented with a cutscene and an important choice regarding the Joja Mart!
Joja Mart
- Managed by: Joja Mart Corporation but also by Morris, Shane and Sam also work there
- Open: 9 am – 11 pm
- Located: Left of Townsquare above the Library
- Purpose: Commercial Store
The Joja Mart is a competition for Pierre’s General Store and a source of controversy within the town as well as a key storyline. You are able to purchase a membership for Joja Mart for 5000 coins.
However, doing so closes the Community Centre permanently as it will then be used as a warehouse for the Joja Mart. On the other hand, if you decide to restore the Community Centre the Joja Mart closes permanently (and some celebration in the village particularly for Pierre)
There are also bundles to complete in the Joja Mart if you pursue this route instead of the Community Centre. However, instead of the vast rewards, the Community Centre offers, completing all the bundles in Joja Mart rewards you with a vending machine that contains only Joja Cola.
The Blacksmith
- Managed by: Clint
- Open: 9 am – 4 pm
- Located: Left of Townsquare immediately above the Library and below the Joja Mart
- Purpose: Processing geodes, purchasing ore, and upgrading tools.
The Blacksmith Shop is owned and managed by Clint, who also lives there. It is going to be a very important building if you are keen on mining. If you find Geodes, you can bring them to Clint, who will process them for you for a fee of 25 coins. You can also purchase Iron, Gold, and Copper ore here, although this is expensive compared to locating it on your own given how much you need to smelt and produce further items such as bars.
You can also upgrade your tools here so that they are stronger and better able to perform tasks. There are levels to your upgrades which are Copper, Steel, Gold, and Iridium. With each increase in cost and quality resources required, you can upgrade your Pickaxe, Hoe, Watering Can, and Axe.
Harvey’s Clinic
- Managed by: Harvey
- Open: 9 am – 3 pm
- Located: Left of Pierre’s store
- Purpose: Medical assistance and purchasing medical supplies
The Clinic is managed by Harvey although Maru works there two days a week. If you pass out you wake up in the Clinic which will cost you some money and also means you will lose some of the supplies you had in your backpack at the time. You can also purchase supplies at the Clinic to take with you on your excavations such as the mine as you will lose health and energy here.
You can purchase an Energy Tonic or Muscle Remedy. Both of which however are expensive as to be expected, the Energy Tonic restores 500 Energy and 200 Health for 1000 coins. The Muscle Remedy restores 50 Energy and 22 Health and removes exhaustion, it can be purchased for 1000 coins.
Residents often go in and out of the Clinic as they visit for their annual check-ups!
Mines
- Managed by: No one
- Open: 24/7
- Located: Right of Lynas’s tent at the mountains
- Purpose: To gather resources and materials
The Mines are initially locked, and unavailable to you. It is available from the 5th day of Spring. There are 120 levels within the mine that you can work through. You will need to bring a pickaxe to break rocks to find geodes, crystals, ore, minerals, and resources.
As you move deeper into the mine, some dangerous monsters and bats begin to appear that you must kill as well, using a sword which you receive as a reward as you move throughout the mines. You find each next level by breaking rocks and finding a ladder, although as you progress, you unlock an elevator that can help you quickly move to certain levels. On deeper levels, you can find the ladder by killing the monsters or bats.
The Spa
- Managed by: No one
- Open: 24/7
- Located: Top of the mountain at the old railroad
- Purpose: Energy Restoration
Although the Spa is open 24/7, it takes some time to unlock. You cannot access this area until an earthquake occurs, which opens up the road to the railway station. The Spa has male and female changing rooms and a shared bath area; standing still in the water in this area helps to regenerate your Energy without having to craft or spend money on food or medical supplies!
Quarry
- Managed by: No one
- Open: 24/7
- Located: Over the bridge at the Adventurer’s Guild
- Purpose: Mining for resources
Although the Quarry is open 24/7, it must first be unlocked by completing the Crafts room bundle at the Community Centre. Here you can mine resources similar to the Mines; however, it is a much smaller area.
Sewers
- Managed by: No one but Krobus lives there
- Open: 24/7
- Located: Through the Sewer cover in the town
- Purpose: Interacting with Krobus
The Sewers are initially inaccessible. To unlock this area, you must donate 60 items to the Museum. After this, you will receive a rusty key from Gunther. The key can then be used to unlock the Sewers via the Sewer cover, once inside you can purchase some items from Krobus such as Void Eggs, a Stardrop, Monster Fireplace, Void Essence, Solar Essence, a Statue, or a Crystal Floor and Wicked Statue recipe.
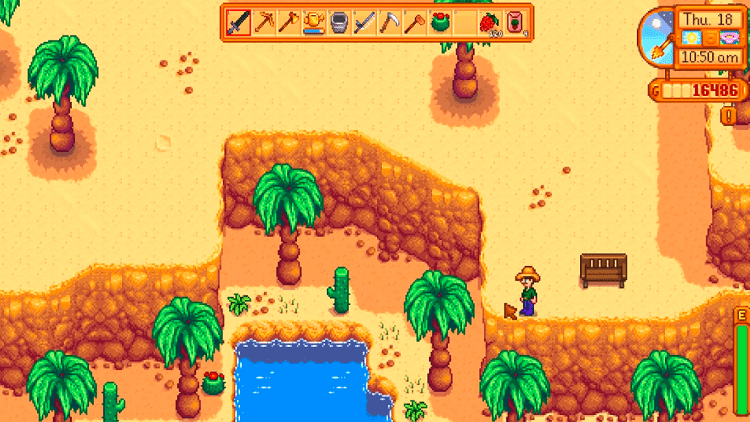
Calico Desert
- Managed by: No one
- Open: 24/7
- Located: By taking the bus from the town bus stop
- Purpose: Mining, looking for resources, or browsing the shop
The Calico Desert is only accessible once the town bus stop is repaired which is done by completing the Vault bundle in the Community Centre. You can only visit once a day on the bus between 9 am and 5 pm, which will cost you 500 coins.
Located within the Desert is a shop called Oasis, where you are able to purchase Seeds such as Starfruit, Rhubarb, and Beet. You can also forage items around the Desert that are valuable, such as Cactus Fruit and Coconuts. The Desert also contains a more challenging style of Mine called the Skull Cavern. However, you will need to unlock this using the Skull key, which can only be found by reaching level 120 of the Mines within the town.
The Adventurer’s Guild
- Managed by: Gill and Marlon
- Open: 2 pm – 10 pm
- Located: Besides the Mines
- Purpose: Purchasing equipment and accepting Mine related Quests
In the Guild, you can browse Quests available on a notice board on the wall. Completing these provides rewards that can also be collected within the Guild. You can purchase Daggers, Swords, Clubs, Boots, and Rings within the Guild. When completing Quests for hunting Monsters, the rewards are Rings, a Mask, a Hat, and an Insect Head.
FAQs
Question: How do I Get Animals?
Answer: You must first request the Coop from Robin, to do this, you need to visit Robin and see how much the Coop will cost and how many resources you need (as well as coins these buildings also cost wood, stone, and coal). If you have enough, you must bring the resources to Robin and request the building. You can only add animals once the building is ready. When this happens, you can visit Marnie and purchase Animals.
Question: How do I get to the Desert?
Answer: Once unlocked, you can access the Desert via the bus stop in the Town, although you can only visit once per day between 9 am and 5 pm. To do this, you must finish the Vault bundle in the Community Centre
Question: Where do I Take My Geodes?
Answer: You can process your Geodes at the Blacksmiths for a small fee of 25 coins during their opening hours of 9 am and 4 pm.
Stardew Valley Locations: In Conclusion
There are many exciting places to visit and explore within Stardew Valley and some seriously important decisions to make with regards to the Joja Mart or the Community Centre! Happy exploring and making good choices!